[101] How to add a layout to your 360° virtual tour?
Lesson 7
This guide will help you add your layout plan on VirtualTourEasy.
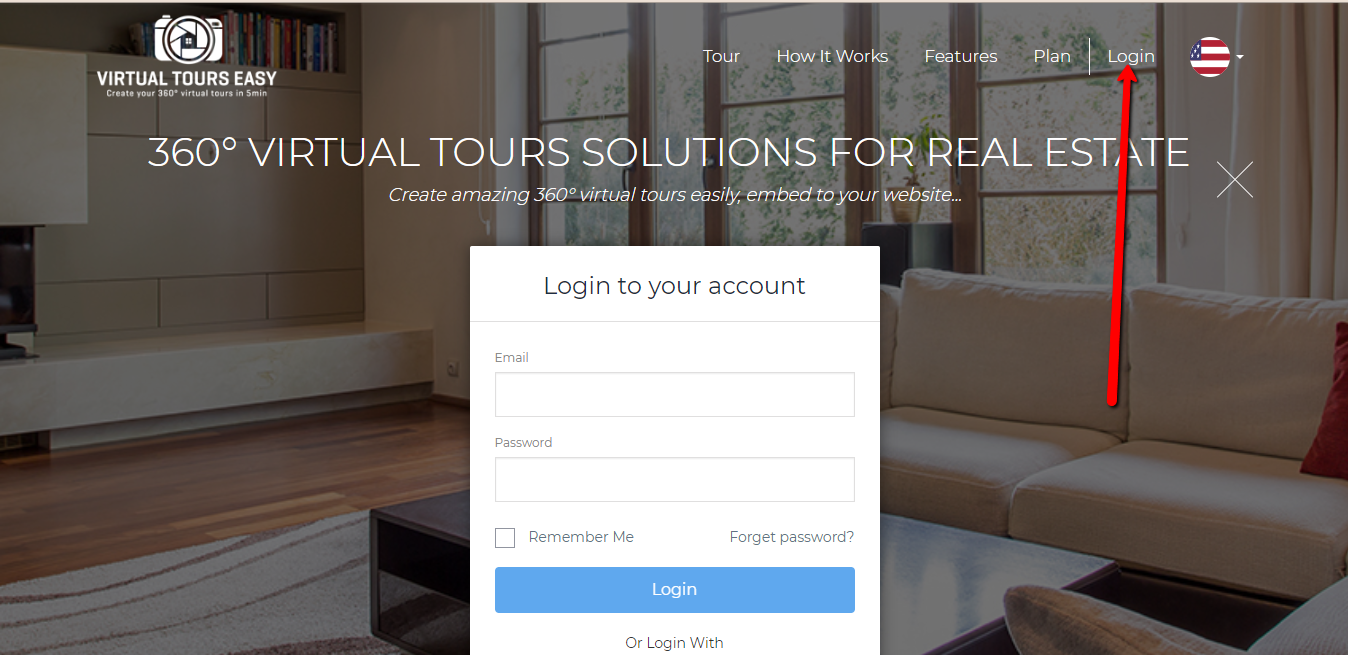
1. Access VirtualTourEasy.com and click the Login Button found on the upper-right part of the page to login.
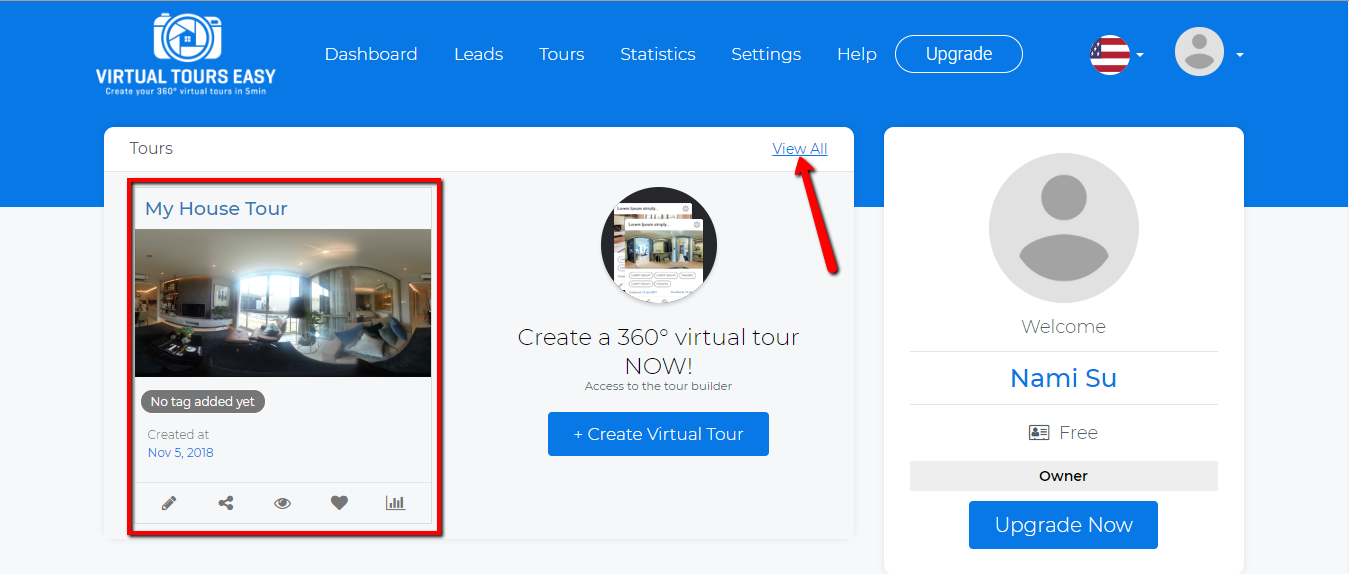
2. Once you're already logged in, you'll be redirected to the Virtual Tour Easy Dashboard. You can find your latest Virtual Tour at the left part of the dashboard or click "View All" to view all your created Virtual Tour.
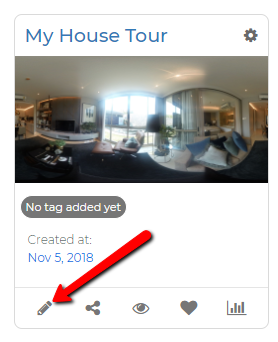
3. Once you found the Virtual Tour that you want to edit, click the Pencil Icon at the bottom-left part of the Virtual Tour to open the Tour Builder.
4. Once inside the Tour Builder, click on the filter icon at the top left of the page to view the Tour Settings Popup.

5. From the Tour Settings Popup, click on the Layout Tab where you can upload the layout image for your Virtual Tour then Click the Layout Image box.

6. You'll see another popup where you can upload the layout plan image. Click on the upload icon to select your desired layout plan.

7. After uploading your desired layout plan image, click on the scene and it's exact location from the layout plan to link them. This will enable the user to view the Virtual Tour from the layout. Don't forget to hit save.

8. After saving your desired layout plan image, click the "Save & Exit" button to save your Virtual Tour.

9. To view your Virtual Tour, click on the preview icon from the dashboard.

10. From the tour view, click on the box icon to open the layout plan. You can then click on the circle icons on the specific scene from the layout plan to go into their corresponding view.
